A conversion on a website or app can be any crucial activity which is important to your business. For example, submitting a form, signing up for email newsletter, or purchasing a product (transaction).
Conversions in GA4 (Google Analytics 4)
In the earlier legacy version of Google Analytics, which is also called as universal analytics, conversions were marked when the goal was completed. You could set up to 20 goals per property. To track more than 20 goals, you needed to create an additional view for that property, or edit an existing goal.
However, the concept of goals is not available in GA4. You can define the conversion for the website directly in the GA 4 reporting interface based on the events that are captured.
You can set up as many conversions as you want and there is no limit to mark any event as conversion. You can modify any event or create a new event based on the occurrence of other events and parameters and then mark it as a conversion.
You can access the conversion reporting by simply clicking the ‘Conversion’ tab available in the ‘Reporting’ menu.

Setting up GA4 conversions for already tracked events
Google Analytics 4 gives you the option to mark any event as a conversion. This is the simplest way to set up conversions for already available tracked events.
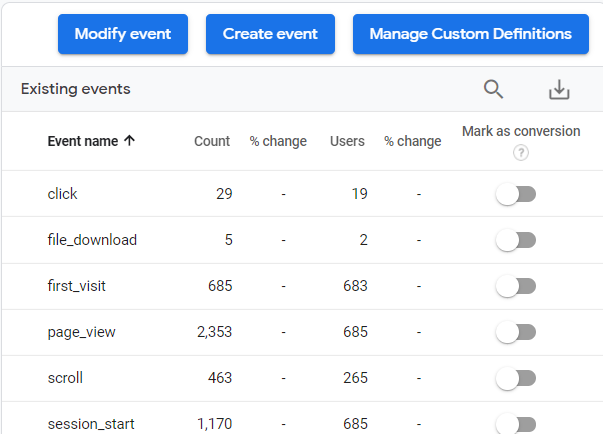
You can see in the below image, I already have multiple events tracked on my website. Some of them are automatically tracked by GA4 and some are custom events tracked using Google Tag Manager. I can mark any of these events as a conversion.
To set conversions for already tracked events follow the below steps.
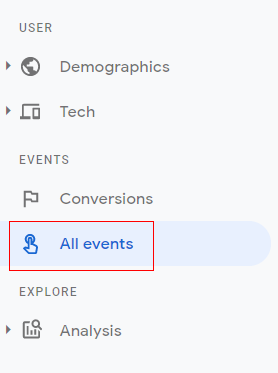
Step-1: Go to your Analytics 4 property and click on ‘All Events’.
Step-2: You will see the events tab console like below. If you want a particular event (i.e. one of the most important ones) to be marked as a conversion, click on the toggle switch available in front of the event to ‘On’. In our case ‘file_download’, ‘Form_submit’ and ‘News_letter_sign_up’ are important events and can be marked as conversions.

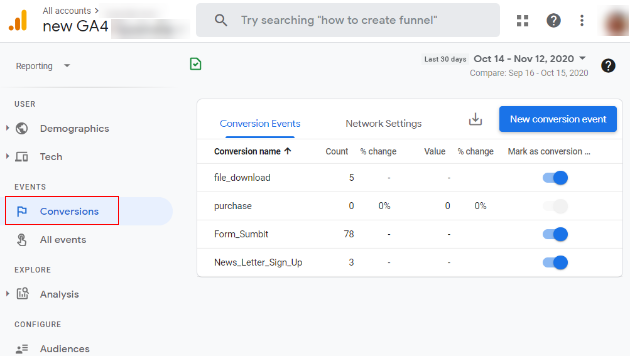
Step 3: Now click on the ‘Conversion’ tab available in the ‘Reporting’ menu. You will see your important events are now available as conversions.
Congratulations!! You have successfully set up conversion tracking for your events.
Setting up GA4 conversions by creating a new event
You can also set up a new conversion event from the ‘Conversions’ tab. Follow the steps below to set up a new GA4 conversion event.
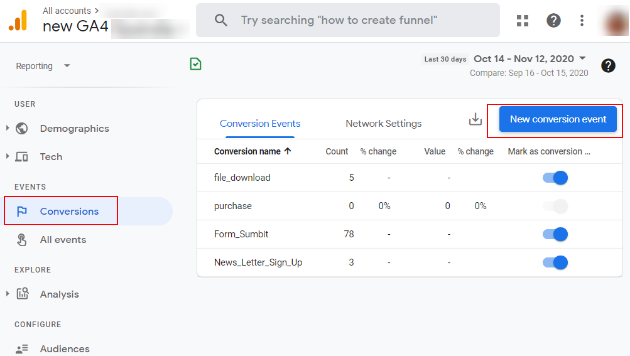
Step-1: Click on the ‘Conversions’ tab. There you will find the ‘New Conversion Event’ button. Click on the button.
Step-2: An overlay will appear as below prompting you to provide a new event name. Give your new conversion event a descriptive name. As an example, we are going to track the ‘thank-you’ page view as a conversion event when a user submits a form. We are going to name this conversion event ‘Lead_genrated’.
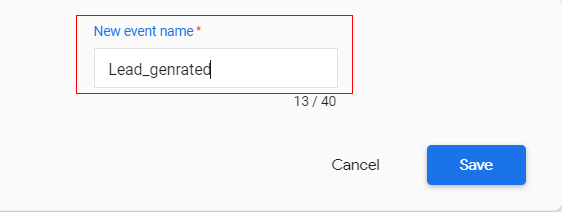
Step-3: Now click on ‘Save’.

Step-4: You can see now in the ‘Conversions’ tab our newly created event ‘Lead_genrated’ being shown, as below
The count of our event is zero (0). This is because we have just created the event in the GA4 reporting interface. Now we need to pass this event when it happens on the website to our GA4 property. There are two ways to do it.
- Pass a custom event using Google Tag Manager
OR
- Use create event functionality in GA4 (by using automatically tracked events and their parameters)