User properties are attributes that can be used to define segments of your user base, such as language preference or geographic location. These user properties provide additional context around the user and events they trigger on the webpage.
User property may change over time. Google Analytics 4 by default automatically logs some user properties, as below:
| User dimension | Type | Description |
|---|---|---|
| Age | Text | Identifies users by six categories: 18-24, 25-34, 35-44, 45-54, 55-64, and 65+. |
| Country | Text | The country the user resides in. |
| Device Category | Text | The category of the mobile device (e.g. mobile or tablet). |
| Device Model | Text | The mobile device model name (e.g. iPhone 5s or SM-J500M). |
| Gender | Text | Identifies users as either male or female. |
| Interests | Text | Lists the interests of the user (e.g. “Arts & Entertainment, Games, Sports”). |
| Language | Text | The language setting of the device OS (e.g. en-us or pt-br). |
If you want to collect additional custom user properties, you can set up to 25 additional user properties per project.
You can use user properties to identify static or slowly changing attributes of the user, such as ‘Location= United States’, ‘User_Type=Beginner’ or ‘User_Type=Premium’.
The attributes are sticky event parameters and whenever the user performs an interaction on the web page user properties are also passed with the events. Even though user properties are sent with an event, they are tied to the user and will not be unique.
You can see user properties in real-time as well as in other Google Analytics reports.
Let’s understand this in more detail while creating a few user properties in GA4.
How to create user properties in GA4
To set user properties, you first need to create them in the reporting UI of Google Analytics 4. Follow the below steps to create a custom user property.
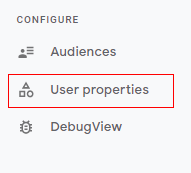
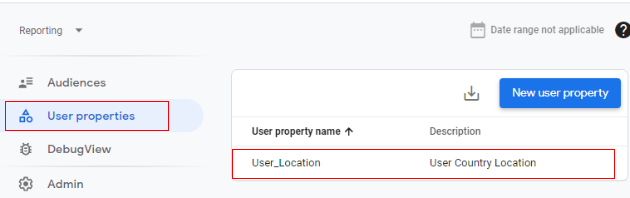
Step 1: Navigate to your Google Analytics 4 property and click on ‘User Properties’ from the reporting menu under ‘Configure’.
Step 2: You will see a configuration panel like below. Now you can click on ‘New User Property’ or if you are creating a user property for the first time you can click on ‘Create your first user property’.

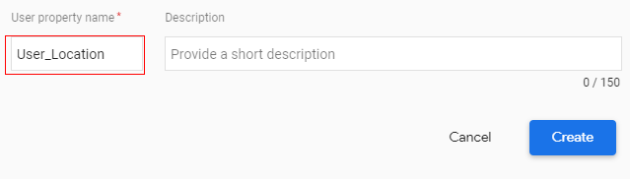
Step 3: An overlay will appear like below asking you to provide ‘User property name’ and ‘Description’. For example, we will create a user property as ‘User_Location’ to identify users from a different country. Type the user property name under the input box provided.
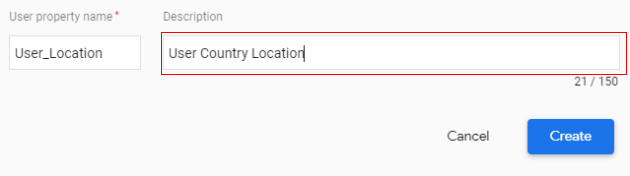
Step 4: Now provide a good description of your user property to make it more understandable. Type the description into the input box provided below.
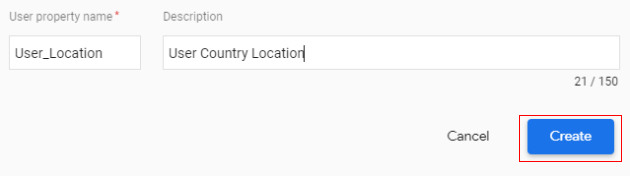
Step 5: Click on ‘Create’.
Congratulations, you have successfully created your first user property. You can access the user property and time by clicking on ‘User properties’.
Now let’s set a user property in Google Analytics 4.
Setting user properties
User properties can be set either by calling gtag(‘set’) command in your website if you are using the global site tag (gtag.js) tagging framework OR you can use Google Tag Manager.
Here I will be creating a user property ‘User_Location’ as an example, using both methods.
Add the user property to your site with gtag.js
You can pass user properties using the following command.
gtag(‘set’, ‘user_properties’, {
User_Location: ‘United States’,
});
Your final code will look like below:
<!– Global site tag (gtag.js) – Google Analytics –>
<script async src=”https://www.googletagmanager.com/gtag/js?id=MEASUREMENT_ID”></script>
<script>
window.dataLayer = window.dataLayer || [];
function gtag(){dataLayer.push(arguments);}
gtag(‘js’, new Date());
gtag(‘config’, ‘MEASUREMENT_ID’); // GA4 Measurement ID
gtag(‘set’, ‘user_properties’, {
User_Location: ‘United States’,
});
</script>
Add the user property to your site with Google Tag Manager
If you are using Google Tag Manager you can use the below steps to set the user property.
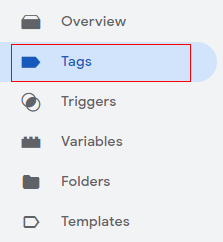
Step 1: Log in to your Google Tag Manager Console and Click on ‘Tags’ in the left-hand side menu.
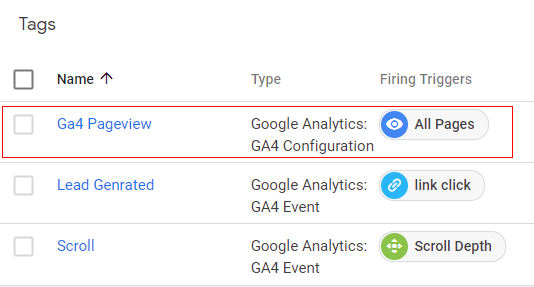
Step 2: Identify your Google Analytics 4 tag and select it.
Note: You can select the ‘Page View’ tag or ‘Events’ tag based on your requirements.
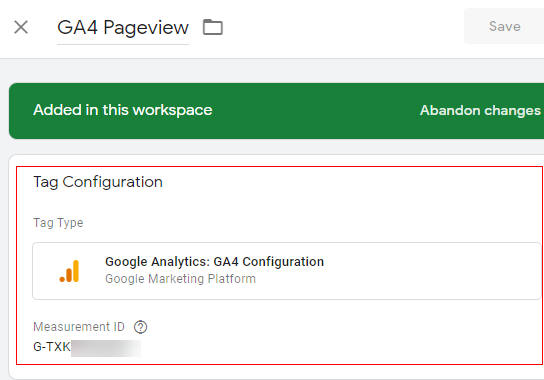
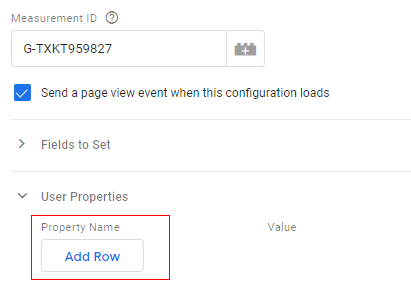
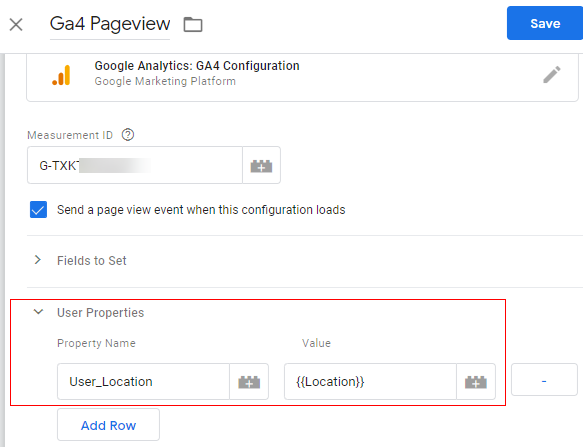
Step 3: The ‘Tag Configuration Panel’ will open like below. Click anywhere on the tag configuration to edit.
Step 4: Now click on the drop-down menu under ‘User Properties’.

Step 5: Now click on ‘Add Row’.
You should now see the two new text boxes: ‘Property Name’ and ‘Value’.
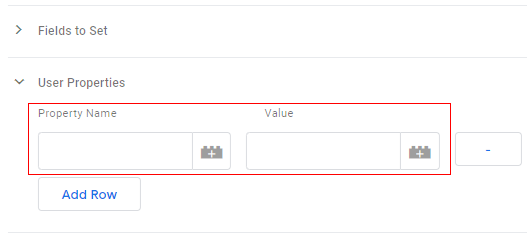
Step 6: Type ‘User_Location’ in the ‘Property Name’ text box.
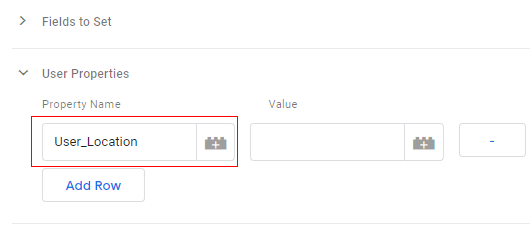
Step 7: Click on the ‘+’ button under the ‘Value’ text box.
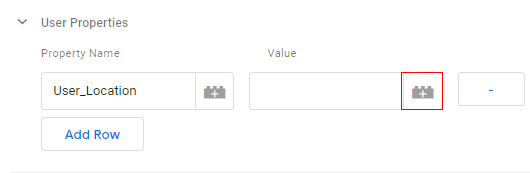
Step 8: An overlay will appear like below. Select the variable which will provide the ‘Location’ value.
Note: You will need to pass the ‘Location’ value (user property) from a variable. How to capture the user location will depend, from business to business. You can use DataLayer or a JavaScript variable.
For more information on variables you can read it here: Introduction to GTM Variables

Once you are done with selecting the variable, your tag will look like below.
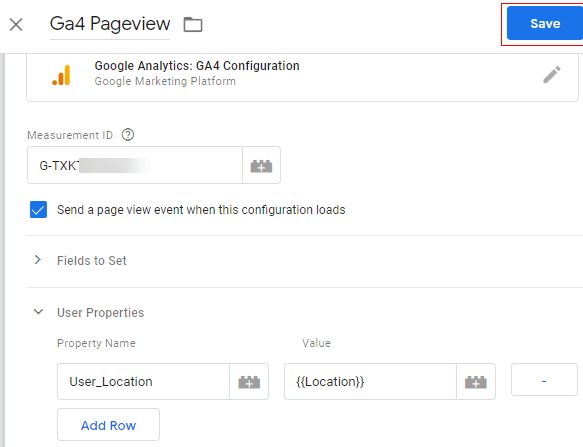
Step 9: Now click on ‘Save’.
Congratulations!!! You have successfully set up the user property. Now it’s time to validate it.
Validate user property in real-time
Google Analytics 4 allows you to validate user properties in real-time.
You can validate the user properties in Google Tag Manager preview mode and also in DebugView reporting which is available in GA4.
Follow the below steps to validate the user property you have created.
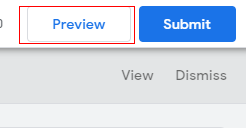
Step 1: Click on ‘Preview Mode’ in the GTM console.
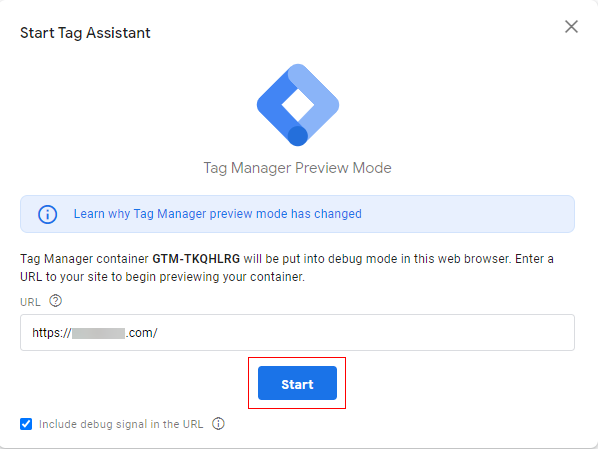
Step 2: New window will open with Google preview mode. Add the URL of the website and click on ‘Start’.
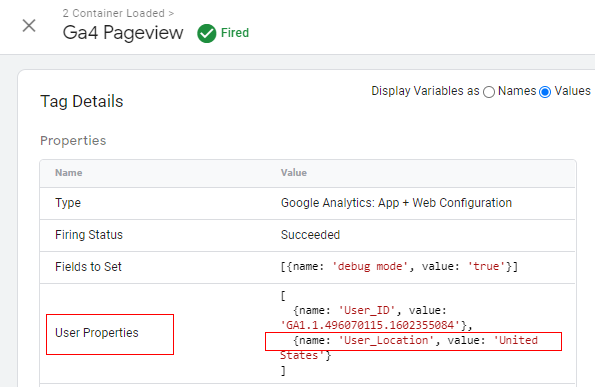
Step 3: Another new window will open with the specified URL. Navigate back to the Google Tag Manager preview window and you can see the ‘Pageview’ tag fired as below. Click on the ‘Page View Tag Fired’.
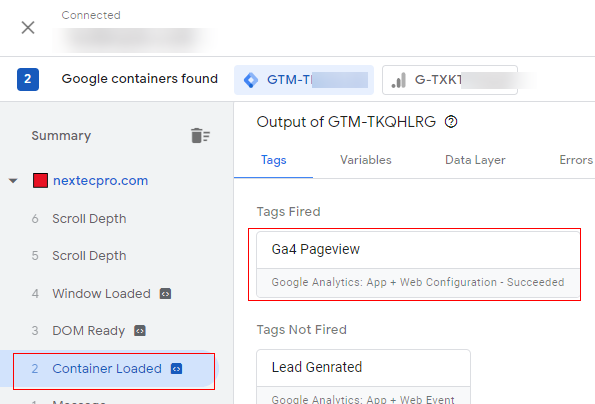
You can see that ‘User_Location’ under ‘User Properties’ has the value ‘United States’, like below.
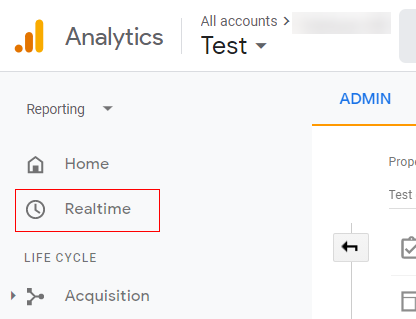
Step 4: You can also check this in real-time in Google Analytics. Just navigate to your analytics property and click on ‘Realtime’.
Step 5: You can see now ‘User_Location’ is populated like below.
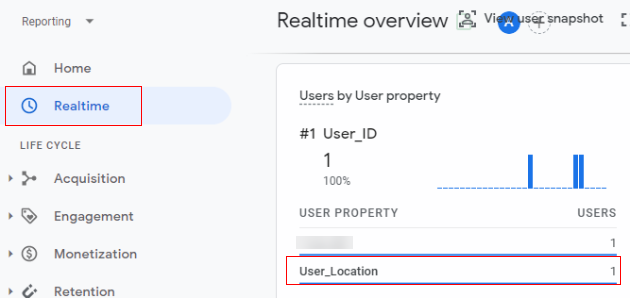
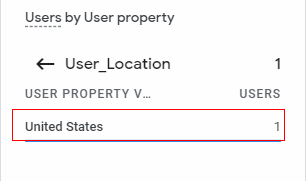
You can click on the ‘User_Location’ user property and see what values are passed.
As you can see from the above Image, ‘United States’ is passed as the value for the user property ‘User_Location’.
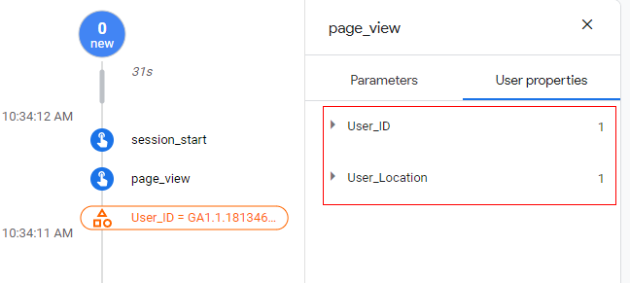
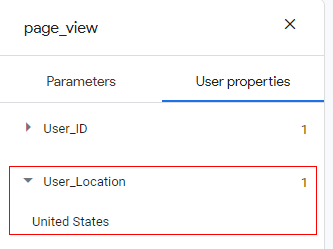
Another way to validate is to view the debug report available in GA4.
You need to carry a few steps before you use the DebugView reporting. You can find the details here How to use DebugView report in Google Analytics 4 (GA4).
Once you are ready with the debugging view prerequisites you can validate user properties.
The following images show how user properties are displayed in DebugView reporting.
Congratulations! You have successfully validated a user property in Google Analytics 4.
Guide to Archive user properties in GA4
Since Google Analytics provides only 25 custom user properties, if any time you exceed the limit or do not want to continue with an existing user property, you can archive any of the current user properties which are not needed or are of less importance.
Follow the below steps to archive a user property.
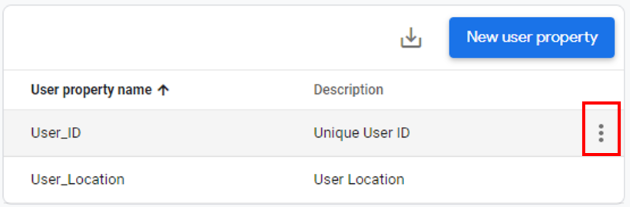
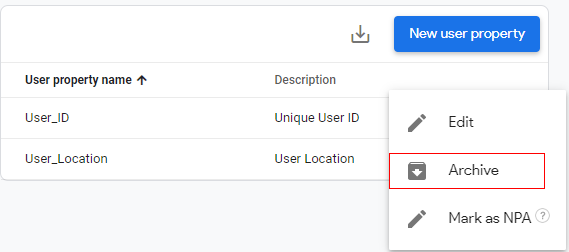
Step 1: Navigate to your Google Analytics 4 property and click on ‘User Properties’ from the reporting menu under ‘Configure’.

Step 2: You will get details of current custom user properties as below. Select the three dots in front of the user property you want to achieve.
Step 3: You will get an overlay like below, click on ‘Archive’.
Step 4: A new pop up will appear, as below. Click on ‘Archive’.

Step 5: You are done. The property you achieved is no longer available.

Summary
User properties play an important role in understanding user behaviour on a website.
By default, there are a few user properties supported by GA4, including age, gender, etc. You can also set up to 25 additional custom user properties in GA4, in addition to the default properties.
You can validate user properties in real-time and DebugView. You also get an option to archive any unwanted user properties.