Sequences let you specify the order in which conditions must be met to the custom audience.
You can create a custom audience that shows a group of users who followed the particular sequence of conditions mentioned. For example, you can create an audience that includes users who did ‘Add to cart’ then begin ‘checkout’ but did not purchase the product.
Let’s create a new audience. You can use this audience for a remarketing campaign.
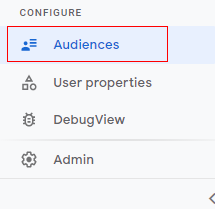
Step 1: Navigate to your Google Analytics 4 property and click on the ‘Audiences’ menu under ‘Configure’.
You will see now a list of available audiences below.
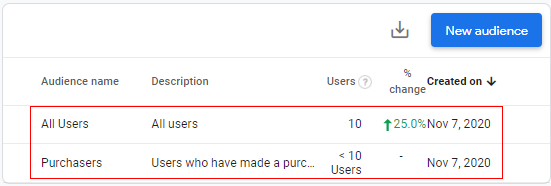
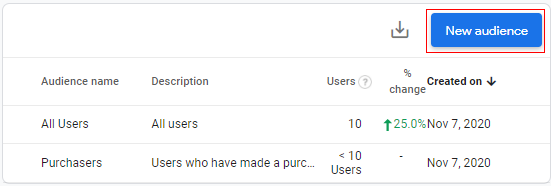
Step 3: Now click on the ‘New audience’ button.
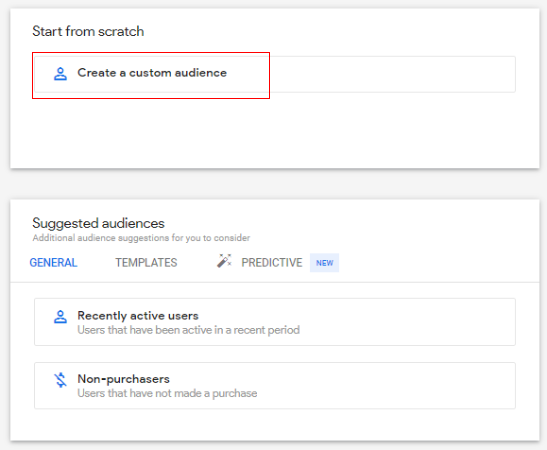
Step 4: Click on ‘Create a custom audience’.
Step 5: A configuration panel will open like below.
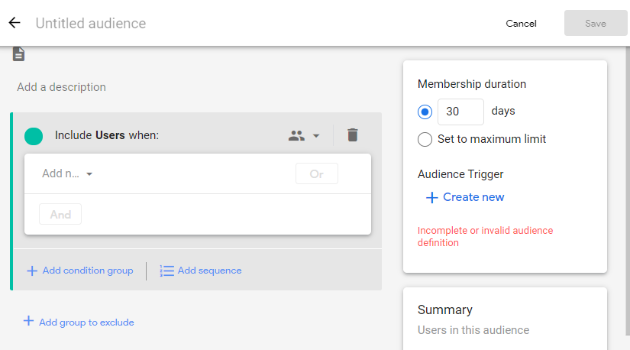
Step 5.1: Give a descriptive name to your audience by clicking on the text box under ‘Untitled audience’.
Step 5.2: Type a descriptive name for the audience.
Step 5.3: Add a description to your audience. Click on ‘Add a description’.
Step 5.4: Type a brief description for the audience e.g. ‘Users who did add to cart, then begin checkout, but did not purchase’.

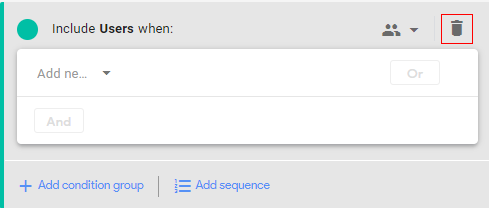
Step 5.5: Click on the ‘Recycle Bin’ (delete option). We are doing this since the configuration panel opens with default condition options and we need to create a sequence of events for which the configuration options are different.
Step 6: Now click on ‘Add Sequence’.
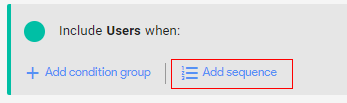
A new configuration panel will appear, as below.
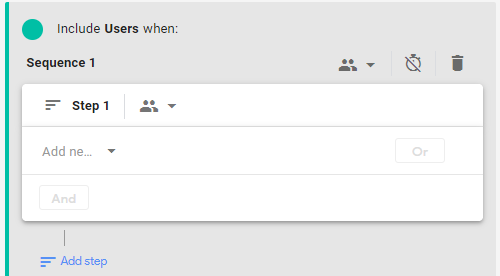
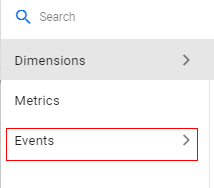
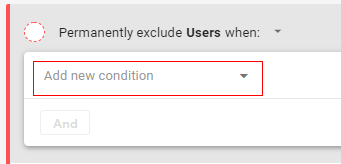
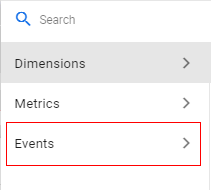
Step 7: Now click on ‘Add a new condition’.
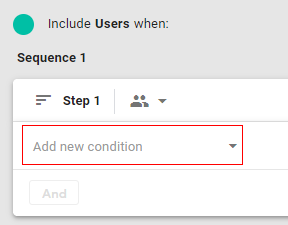
A pop up will appear like below. You can select any dimension, metric, or event parameter to distinguish your custom audience.
You can select it from the available menu or simply type it in the search bar and then select it.

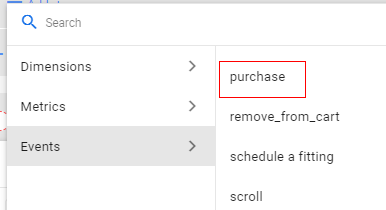
In our case, we will select ‘Event’.
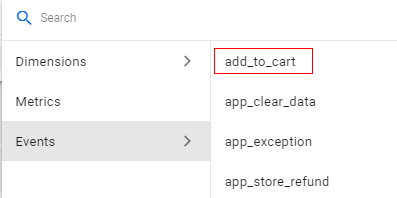
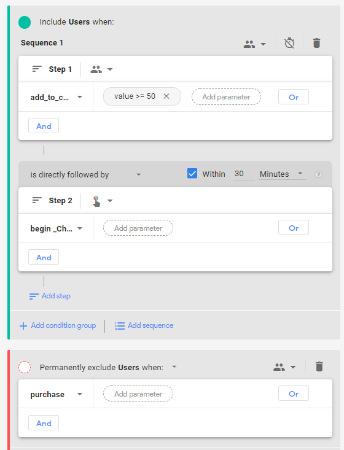
Step 8: A list will be shown below. Select the event (first event in sequence) from the list. In this case, we will select ‘add_to_cart’.
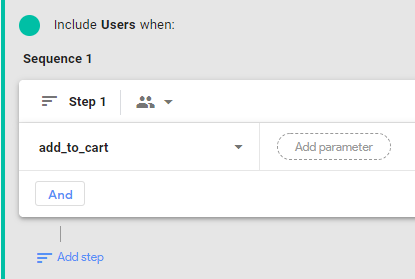
Your screen will appear like below.
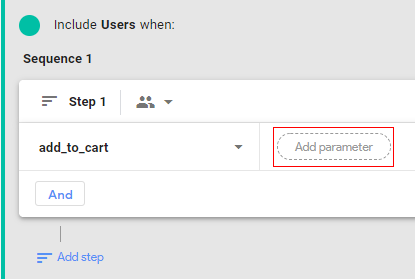
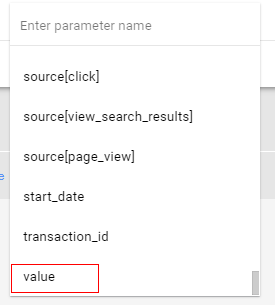
Step 9 (optional step): You can additionally click ‘Add parameter’ if you want to filter your audience on a more granular level.
A list will appear below. Select any parameter that you want to add. Let’s say I want to add the parameter ‘Value’.
Now click on the drop-down under condition.
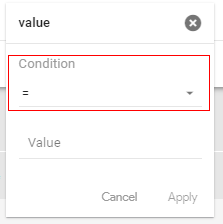
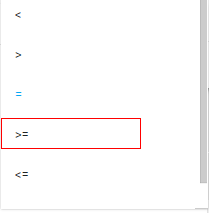
Select the condition from the available list. In our case, I will select ‘>=‘ (greater than or equals).
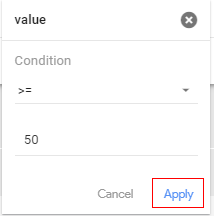
Now click on ‘Value’ and type any numeric value for which you want to create an audience. Let’s say ‘50’.

This will add a condition for users who did add to cart with a value more than or equals to $50. The currency may vary depending upon its configuration in the ‘Admin’ section).
Now click on ‘Apply’.
Your first sequence step will look like below.
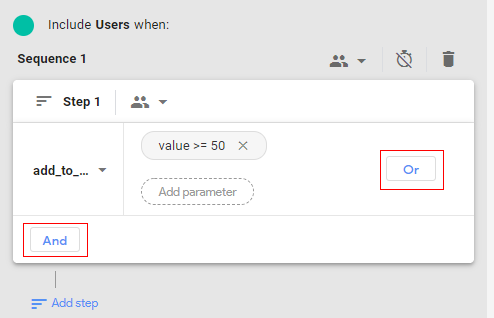
You can add multiple conditions with ‘OR’ logic and ‘AND’ logic, as required.
Step 10: Now click on ‘Add step’.
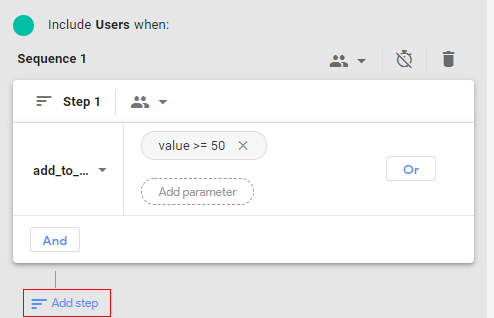
You will get a console, like below.
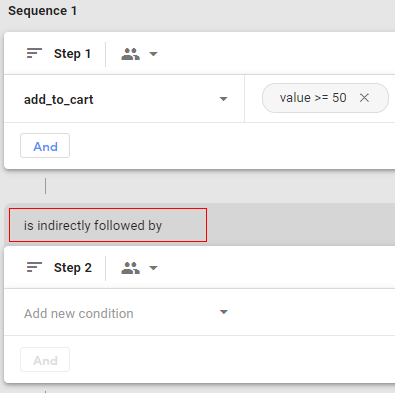
As you can see from the above image, the second event in the sequence is by default showing ‘is indirectly followed by’. This means the second step can happen any time after the previous step.
You can change this to ‘directly followed by’ which means the second step must happen immediately after the previous step, or within a specific timeframe.
Step 11: Click on ‘is indirectly followed by’ drop-down to change the condition and you will get below options.
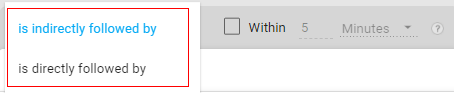
Step 12: Select ‘is directly followed by’.

Step 13: Mark the check box as below.
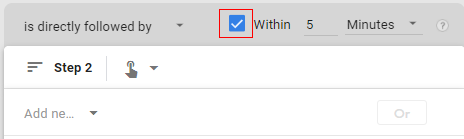
Step 14: Specify the time frame. For example, let’s set it up for 30 mins. Click on the input box and type 30.
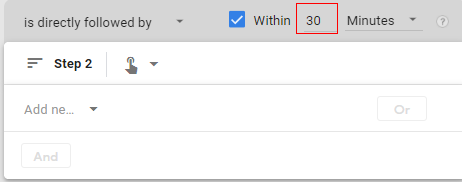
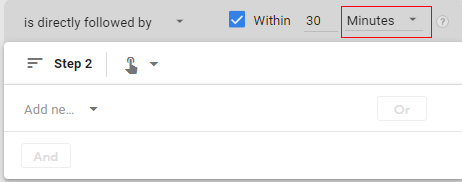
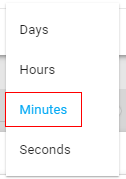
Step 15: Click on the drop-down under ‘Minutes’.
You will get a pop up list from which to select the available options, such as seconds, minutes, hours, and days. In our case, we will go with ‘Minutes’.
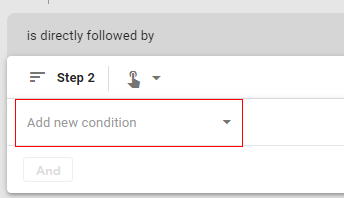
Step 16: Now click on ‘Add new condition’ under ‘Step 2’.
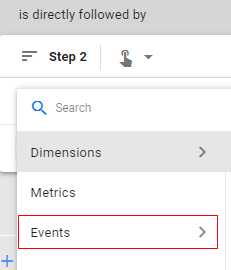
Step 17: Select ‘Event’ from the populated list.
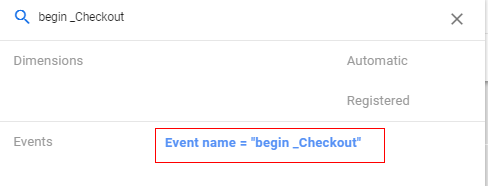
Step 18: Select ‘begin_checkout’ event.
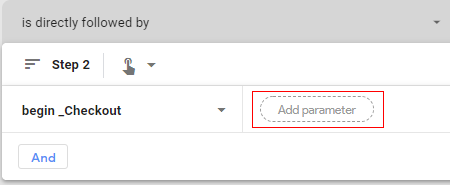
You can add a parameter to the event if you want to select a more granular condition for the audience.
Now since we are creating a sequence for the custom audience (remarketing audience) we need to exclude the users who have completed a purchase.
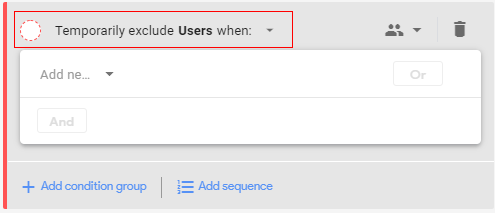
Step 19: Now click on ‘Add group to exclude’.

Step 20: You will get an overlay like below. Click on the drop-down in front of ‘Temporarily exclude users when’.
Step 21: A pop up will appear like below.
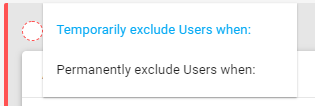
Temporarily exclude users when: Select this condition if you want to exclude users who have not perform the purchase event currently (in current membership duration of users where scope defined at current session-level).
Permanently exclude users when: Select this condition if you want to exclude users who have not purchased through complete user journey (user scope set to all sessions).
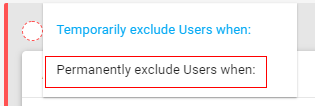
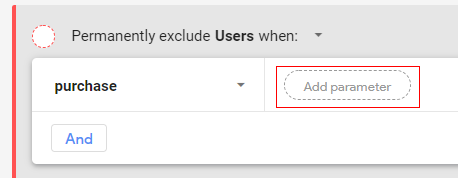
In our case, we will select ‘permanently exclude users when’ this will exclude all users who have not performed any purchase event in their lifetime.
Step 22: Click on the drop-down beside the user icon.
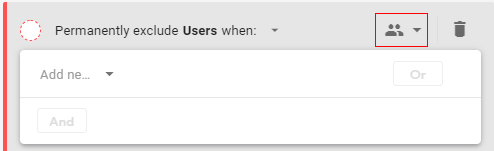
Step 23: You will see a pop up like below. Select ‘Across all sessions’.

Note: If you have selected ‘Temporarily exclude Users when’ in the earlier step then select condition scoping as ‘within the same session’. This will only exclude the users who have not performed the purchase event in the same session.
Step 24: Now click on ‘Add new condition’.
Step 25: Select ‘Event’ from the populated list.
Step 26: Select the ‘Purchase’ event from the list.
Your configuration will appear like below. You can add a parameter to the event if you want to select a more granular condition for the audience.
Your completed audience configuration will appear like below.
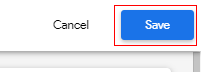
Step 27: Now click on ‘Save’ in the upper right corner.
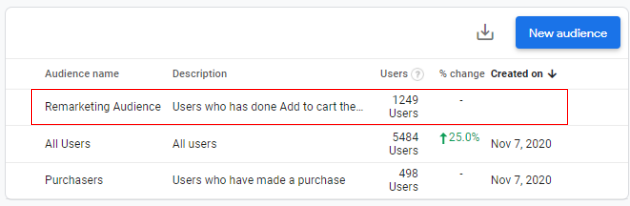
Congratulations! You have successfully created a custom audience for remarketing using sequence and exclude options.
You can see your custom audience in the audience list.
That is how you can create a custom audience in Google Analytics 4 (GA4).