Scroll tracking allows you to measure how website users are engaging with your content. It also provides the ability to change an unnecessarily high bounce rate to a meaningful and real bounce rate.
What is scroll tracking in Google Analytics 4
Google Analytics 4 tracks scroll events by default through its enhanced measurement options.
With enhanced measurement in GA4, you can automatically track and measure interactions and content on your sites in addition to standard page views. Scrolls, outbound clicks, site search, video engagement, and file downloads are the events tracked automatically.
Caveat: By default, GA4 tracks only 90% scroll events. But what about the other scroll depths, like 10%, 25%, 50% and 75%?
These scroll depth events also play an important role in measuring user behaviour on a website, especially if you have a heavy content website.
Another thing to note is that GA4 only tracks vertical scroll events with no parameter collected for the event. If you want to set up scroll events for lesser thresholds (10%, 25%, 50% and 75%) or horizontal scroll tracking you need to set up custom events using the global site tag (gtag.js) or Google Tag Manager.
Let’s set up scroll tracking for your Google Analytics 4 property using Google Tag Manager by following below steps.
Setting up scroll tracking in Google Analytics 4 using Google Tag Manager
Note: You must have GTM container code available on the website before proceeding through these steps.
Scroll depth threshold is a built-in variable in GTM and it should be enabled to use it in our events. If by any chance it’s not enabled, you can enable it by going to the ‘Variable’ tab.
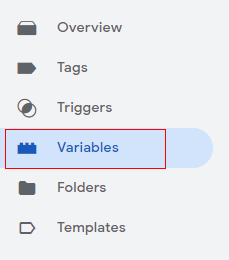
Under ‘Built-in Variables’ click on ‘Configure’.
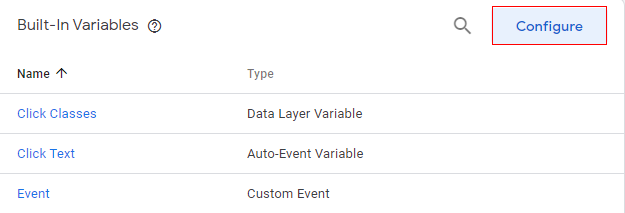
Click on every checkbox under ‘Scrolling’ to enable the required variables.

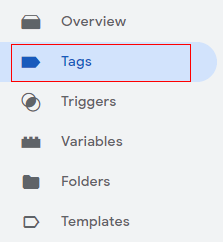
Step 1: Log in to your Google Tag Manager console and click on ‘Tags’ in the left-hand side menu.
Step 2: Click on ‘New’ to create a new scroll event tag for your GA4 property.

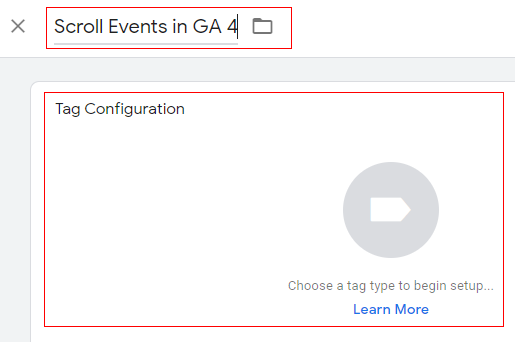
Step 3: Give a proper name to your tag and click on ‘Tag Configuration’.
Step 4: An overlay will appear at the right-hand side with a list of tag templates. Select ‘Google Analytics: GA4 Event’.
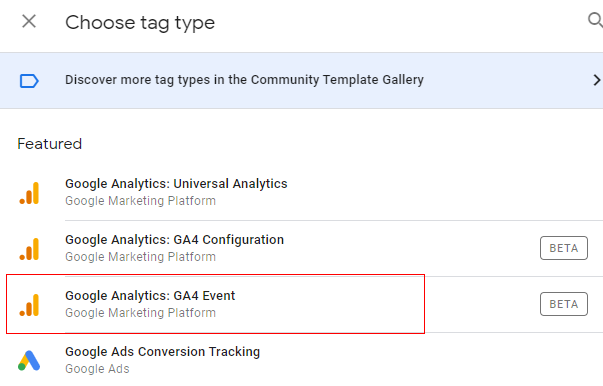
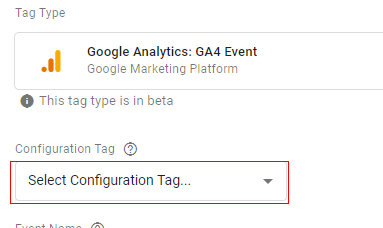
Step 5: The tag configuration window will open, as below. Click on ‘Select Configuration Tag’.
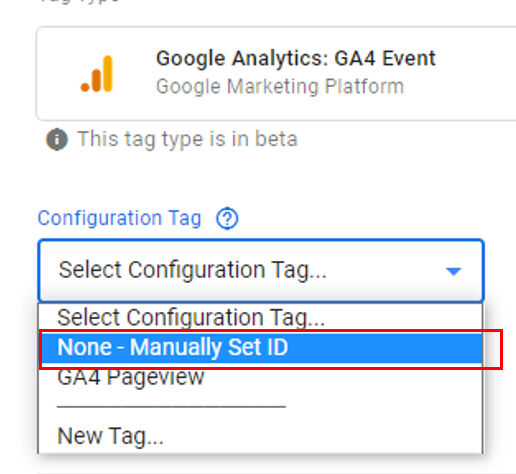
Step 6: A drop-down menu will appear. You can either select your pageview tag or ‘None- Manually Set ID’ from the drop-down. In our case, we will select ‘None- Manually Set ID’.
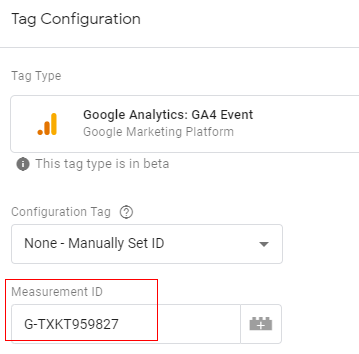
Step 7: The next step is to enter the GA measurement ID in the input box.
You can find your measurement ID in the ‘Admin’ section under ‘Data Streams’.

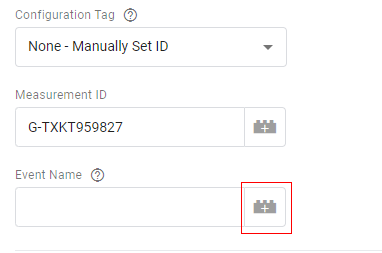
Step 8: Specify the name of the event. The event name you provide here will appear in you GA4 analytics reporting.
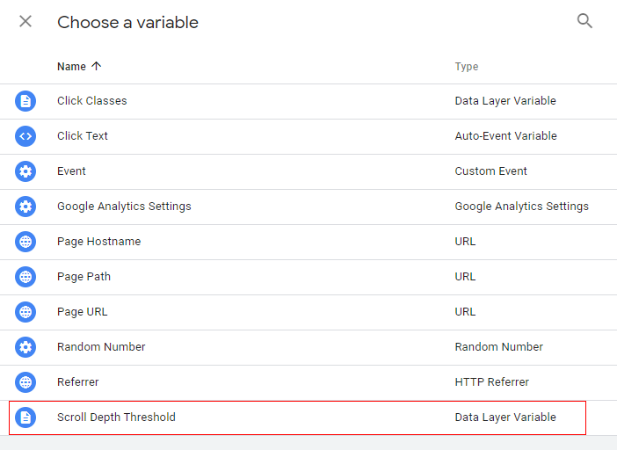
In our case, we want to measure vertical scroll events at 10%, 25%, 50% and 75%. So, we can add a ‘Scroll Depth Threshold’ variable. This will only provide a value like 10, 25, 50 and 75 but we want our event name to be more descriptive hence we can add ‘%’ after selecting ‘Scroll Depth Threshold’ and text as ‘Scroll’.
This will give an event name as ‘10% scroll’, ‘25% Scroll’, ‘50% Scroll’ and ‘75% Scroll’.
Click on settings icon with ‘+’ on it like below to add variable.
Step 8.1: An overlay will appear like below. Select ‘Scroll Depth Threshold’.
Step 8.2: Add the ‘%’ sign immediately after the curly braces.

Step 8.3: Now enter a space and then add ‘Scroll’ as text in the input box.

You can also add parameters and user properties to the event but this is optional. Additional parameter and user properties are nothing but custom dimensions that you would like to pass along with the event. Since the event name is sufficient to define the user activity, we are not adding any parameters or user property to this event.
Step 9: Now let’s create a trigger condition to fire our tag. Click anywhere under ‘triggering’.

Step 10: An overlay will appear like below. Click on the ‘+’ icon to add a new trigger.

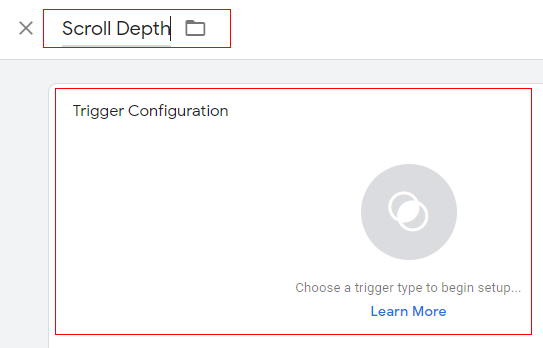
Step 11: Give a proper name to your trigger and click anywhere in ‘Trigger Configuration’.
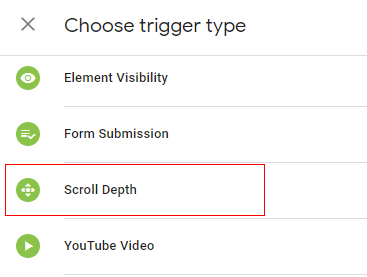
Step 12: An overlay will appear like below. Click on ‘Scroll Depth’.
Step 13: Trigger configuration settings options will be available as below. You will get two checkboxes called ‘Vertical Scroll Depth’ and ‘Horizontal Scroll Depth’. You can select one based on your business need or you can even select both. In our case, we are tracking the vertical scroll only.
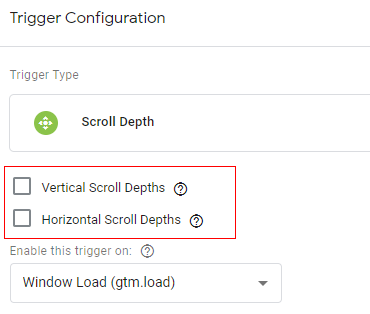
Select the ‘Vertical Scroll Depth’ option.
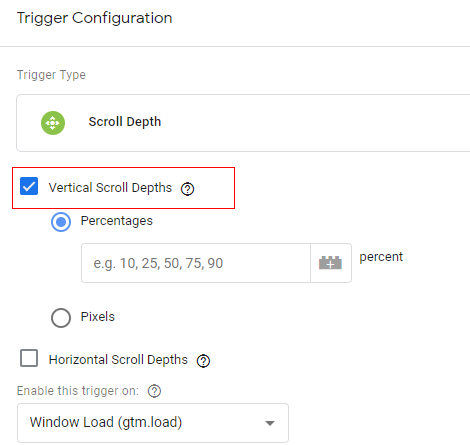
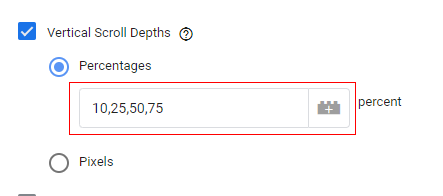
Step 14: You also get the option to measure the scroll depth in percentages or in pixels. In our case, we are going to measure it by percentage scrolled. By default, the percentage radio button is selected. Add your own threshold limits separated by commas in the input box like below.
Step 15: Click on the ‘Save’ button to save the trigger configuration.

Congratulations! You have successfully created your custom scroll tracking event. Now let’s debug it and preview.
Debug and preview scroll events
Step 16: Click on the ‘Preview’ button (on the top right-hand side) to preview and test your new scroll tracking setup.
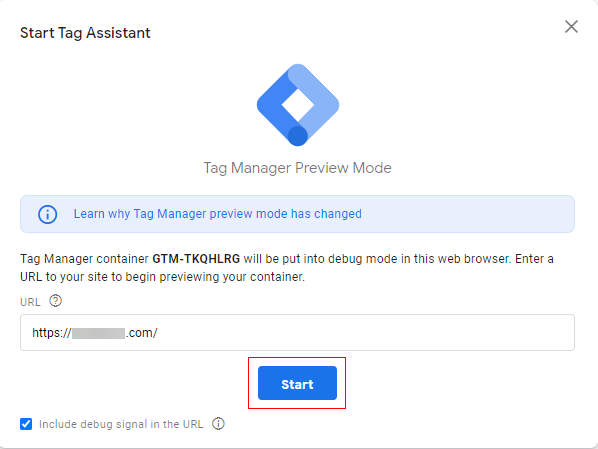
Step 17: New window will open with Google preview mode. Add the URL of your website and click on ‘Start’.
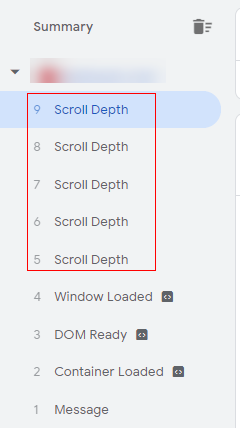
Step 18: Another new window will open with the specified URL. Now gradually scroll down your webpage until you reach the bottom. As you start scrolling down you should see new ‘Scroll Depth’ events in GTM preview mode tab, showing one after another under the ‘Summary’ column.
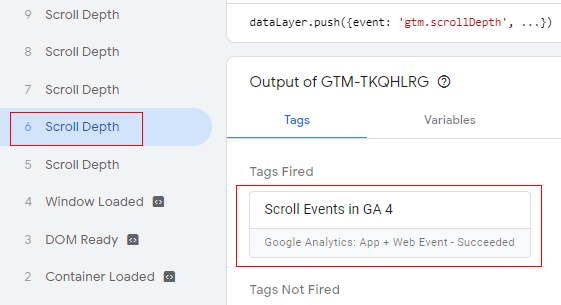
Step 19: Click on any ‘Scroll Depth’ event and you should see your tag is firing like below.
Step 20: Click on the scroll tag name under ‘Tags Fired’.
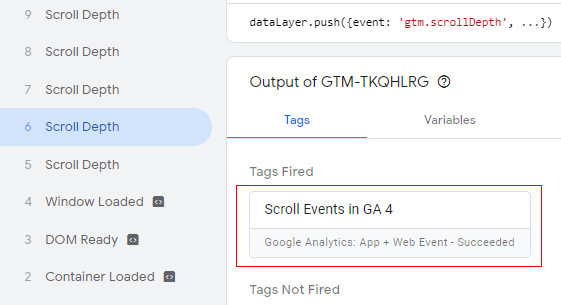
Step 21: A new overlay will appear like below providing details of our tag and trigger.
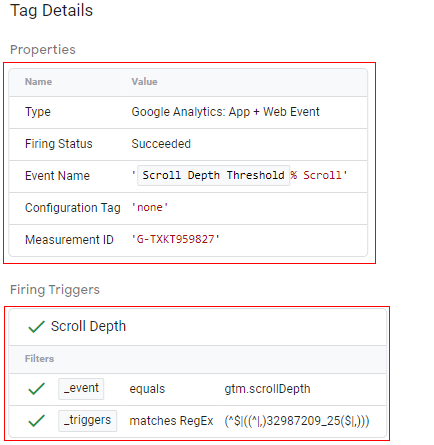
Note: You can see in the image above that the event name is ‘Scroll Depth Threshold% Scroll’. Here ‘Scroll depth threshold’ is the predefined variable and ‘%’ and ‘Scroll’ are text values that we provided while defining the event name.
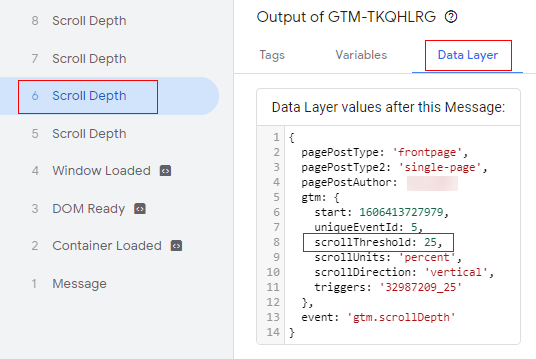
Step 22: To check the value of ‘Scroll Depth Threshold’ click on ‘Data Layer’ and you can see the threshold value for the selected event from the summary tab.
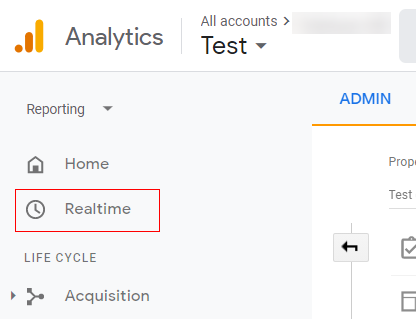
Step 23: You can also check this in real-time in Google Analytics. Just navigate to your analytics property and click on ‘Realtime’ in the left menu.
Step 24: You will see real-time scroll events firing for our custom threshold defined like below.
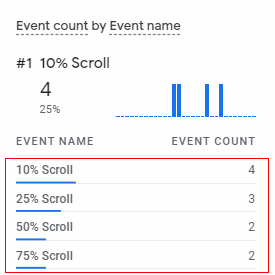
Congratulations, you have successfully set up a custom scroll tracking event for Google Analytics 4 using Google Tag Manager.
To check the event’s details in GA4 console you can click on ‘All Events’ at the left side reporting menu and you will get the details of all scroll tracking events occurred on the website like below.
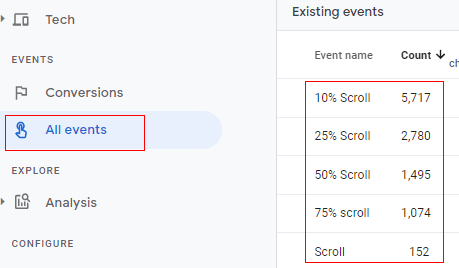
Note: In the above image you can also see an event as ‘Scroll’ with 152 counts. This event is predefined evet tracked by GA4 at the threshold of 90%.
Summary
Since Google Analytics 4 provides by default scroll tracking, it is limited to 90% of scroll depth threshold. If you want to track custom threshold events (10%, 25%, 50% and 75%, etc) you need to set up custom events either using Google Tag Manager or global site tag.