Custom events are the events in GA4 (Google Analytics 4) that you create and use.
Google recommends that before you create a custom event, make sure that there is not an automatic, enhanced measurement or recommended event that already provides what you need.
To set up custom events in GA4 via Google Tag Manager follow the steps below:
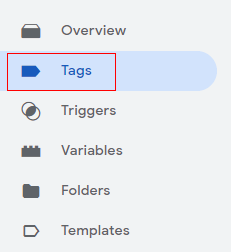
Step-1: Log in to your GTM account and then click on ‘Tags’ in the left-hand side menu:
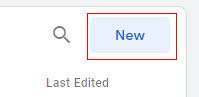
Step-2: Click on the ‘New’ button to create a new tag:
Step-3: Name your tag ‘Button Click’ and then click on ‘Tag configuration’.
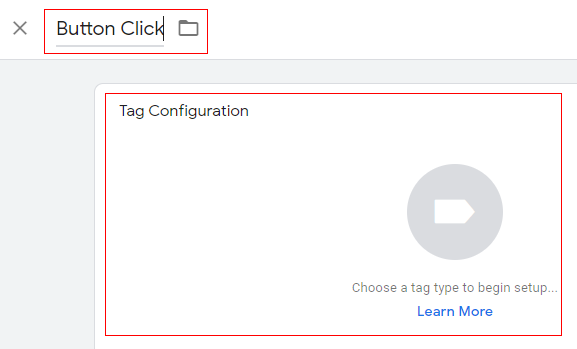
An overlay will appear at the right-hand side with a list of tag templates:

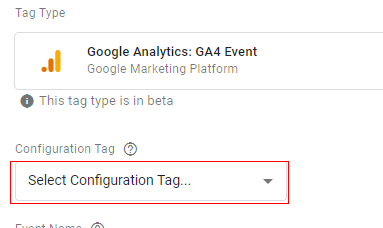
Step-4: Click on ‘Google Analytics: GA4 Event’.
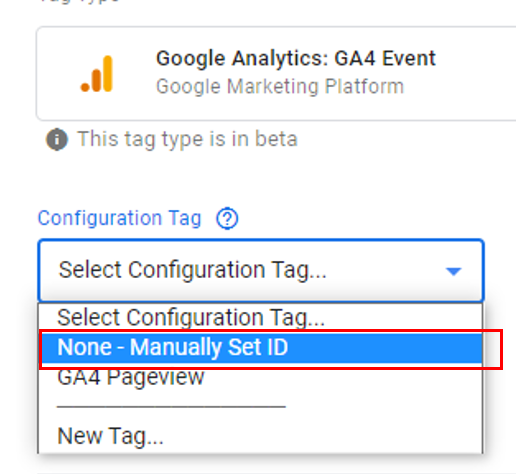
Step-5: Click on ‘Select Configuration Tag’ drop-down menu:
Get the FREE E-Book (50+ Pages)
Step-6: If you have setup configuration tag then select that tag, otherwise select ‘None- Manually Set ID’ from the drop-down:
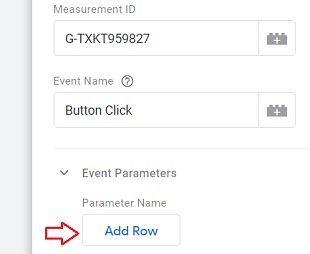
Step-7: Enter the Measurement ID in the input box:
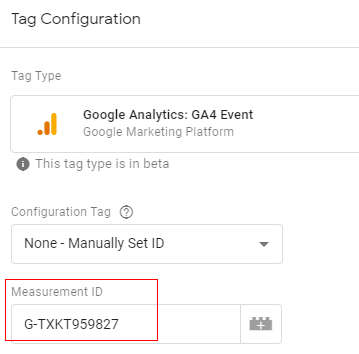
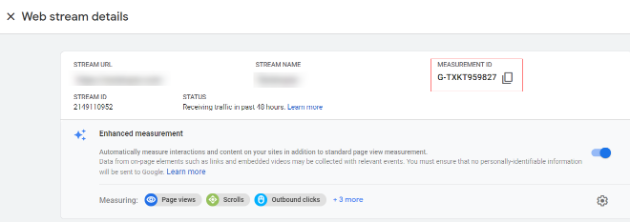
You can find your measurement ID in the ‘Admin’ section under ‘Data Streams’.
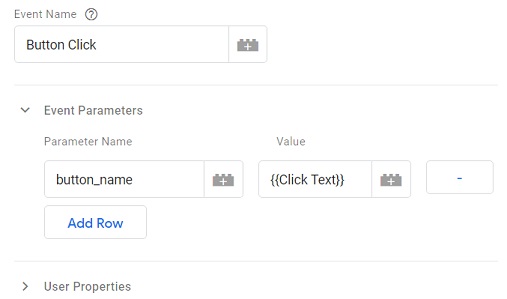
Step-8: Enter ‘Button Click’ in the ‘Event Name’ text box:
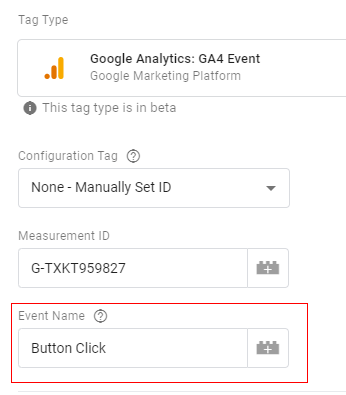
The event name you provide here will appear in your GA4 reports.
Step-9: Click on the ‘Event Parameters‘ drop-down menu:

Step-10: Click on the ‘Add Row’ button:
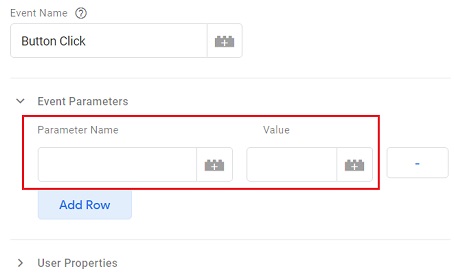
You should now see the two new text boxes: ‘Parameter Name’ and ‘Value’:
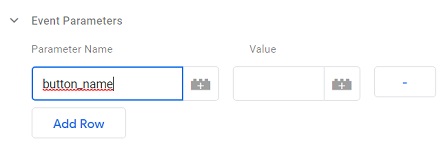
Step-11: Type ‘button_name’ in the ‘Parameter Name’ text box:
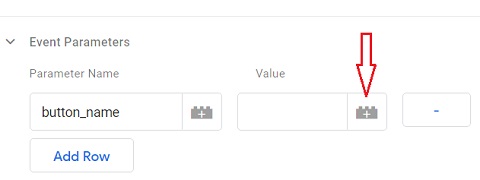
Step-12: Click on the ‘+’ button under the ‘Value’ text box:
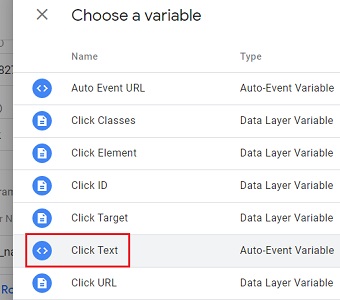
Step-13: Click on the ‘Click Text’ variable:
Your final set up may look like the one below:
Note: Adding event parameters to the event is optional.
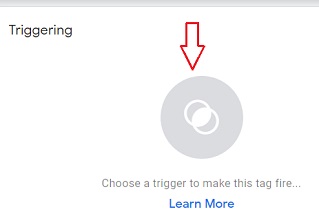
Step-14: Click on the trigger button to create a new trigger:
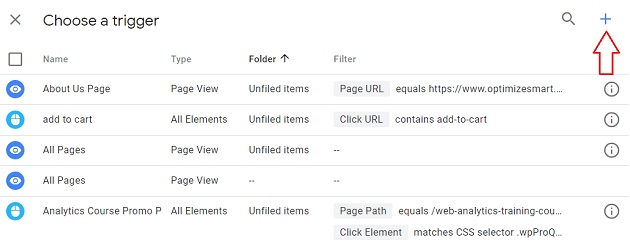
Step-15: Click on the ‘+’ button at the top right-hand side of your screen:
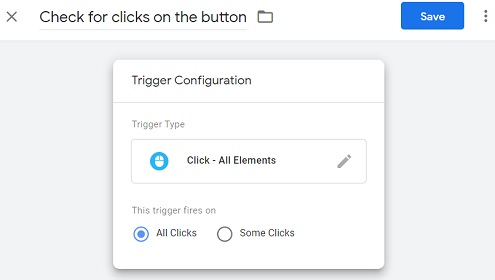
Step-16: Name your trigger and then click on ‘Choose your trigger type’ button:

Step-17: Click on ‘All Elements’ trigger type:

Step-18: Click on ‘Some Clicks‘:
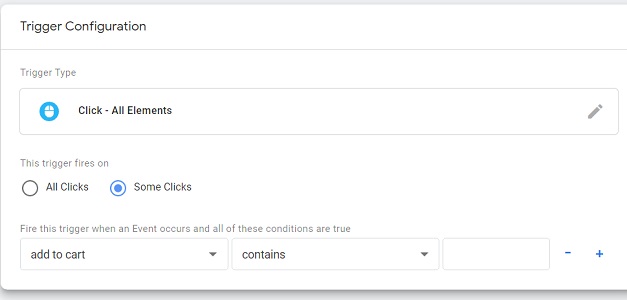
Step-19: Set the following trigger condition:
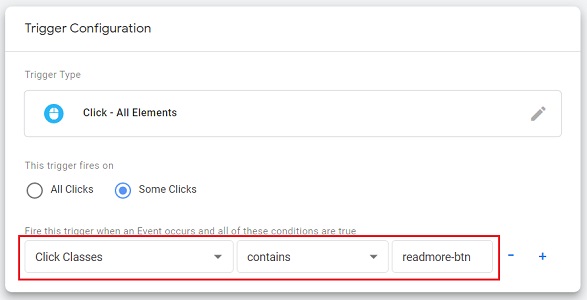
Here the trigger condition will fire the tag only when the click classes contains ‘readmore-btn’
You would need to find the class name of your button element. Don’t use the class name that I have used.
Step-20: Click on the ‘Save’ button (at the top right-hand side of your screen) to save your new trigger.
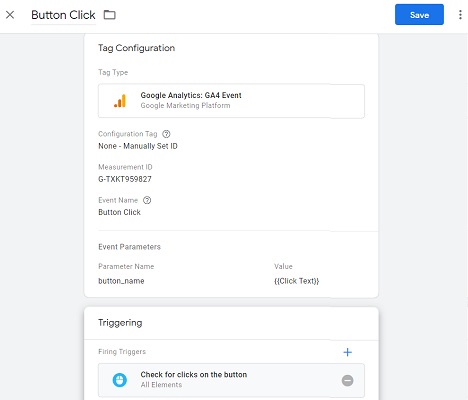
Your entire tag set up may look like the one below:
Step-21: Click on the ‘Save’ button (at the top right-hand side of your screen) to save your new tag.
Step-22: Click on ‘Preview’ button:

A new tab will open with GTM Preview Mode.
Step-23: Add the URL of the page where the button you want to track is available and then click on the ‘Start’ button:

You will now be automatically redirected to a new tab in your browser window which shows the web page whose URL you typed.
In my case the page looks like the one below:

It contains a ‘Read More’ button. I am going to track clicks on this button.
Step-24: Click on the button.
Step-25: Navigate back to the preview window of GTM and check whether or not your tag is fired on the click event:
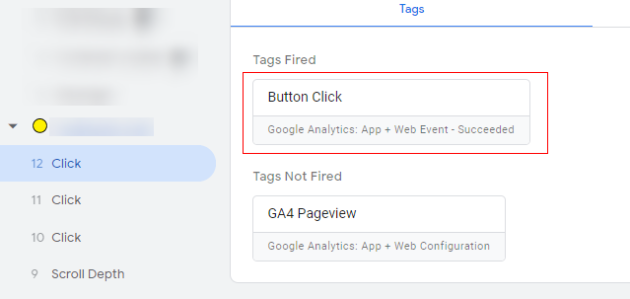
As you can see from the screenshot above, our button click has fired.
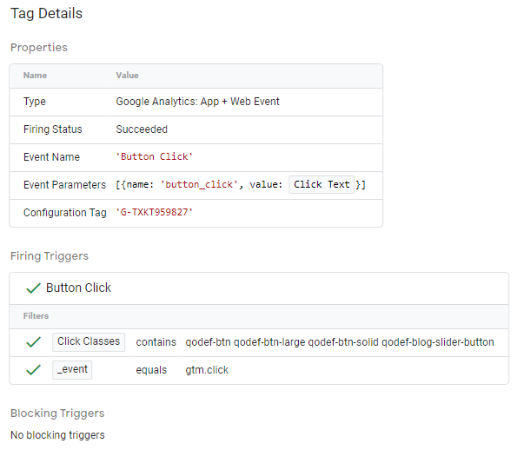
Step-26: Click on the ‘Button Click’ tag. You should now see the ‘Tag Details’ page like the one below:
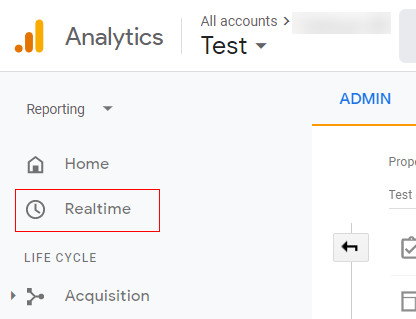
Step-27: Navigate to the ‘Realtime’ report of your GA4 reporting view:
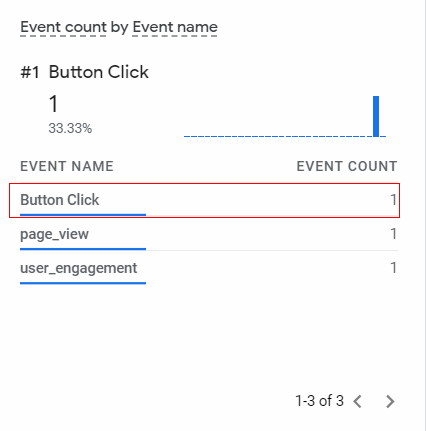
You should now be able to see the button click event being reported by GA4:
Congratulations, you have successfully set up a custom event for GA4 using Google Tag Manager.

After 12-24 hours have elapsed, your button click event should appear in your ‘All Events’ report: